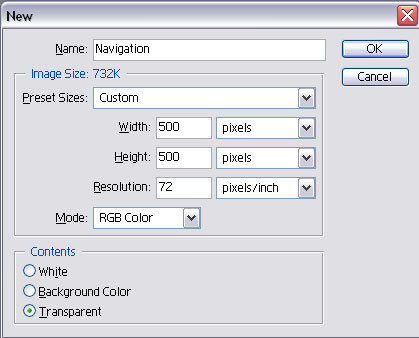
Web Design Graphics Tutorial#1: Using Photoshop for Game Website Navigation Step#1: Open a new document in Photoshop. Go to file>New or press CTRL+N. Step#2: It will open a box where you can mention the width and height for your navigational menu.
Step#3: Now choose a new layer and change your foreground
color to # CD8E12 and background color to # F2C060. Of course, you can
choose any color combination you like. Choose the Gradient Tool and
choose Radial Gradient
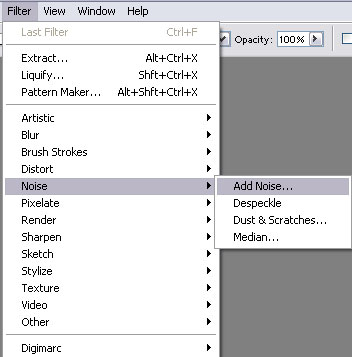
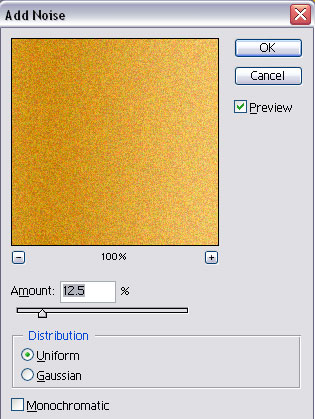
Step#4: Now got to Filter > Noise > Add Noise
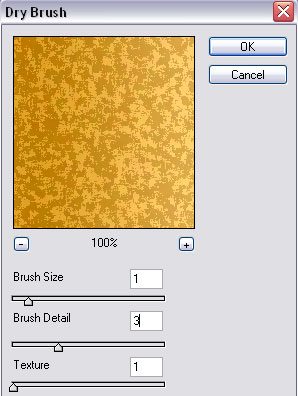
Go to Filter > Artistic > Dry Brush
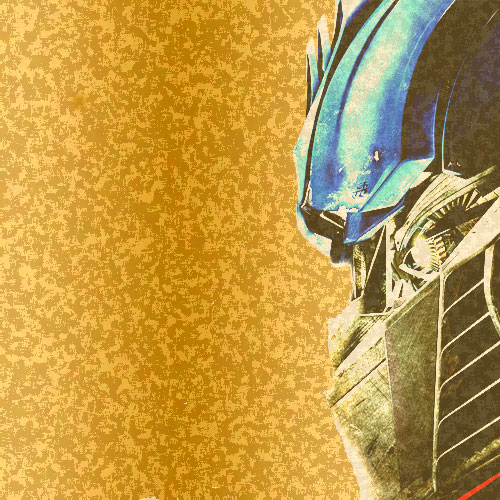
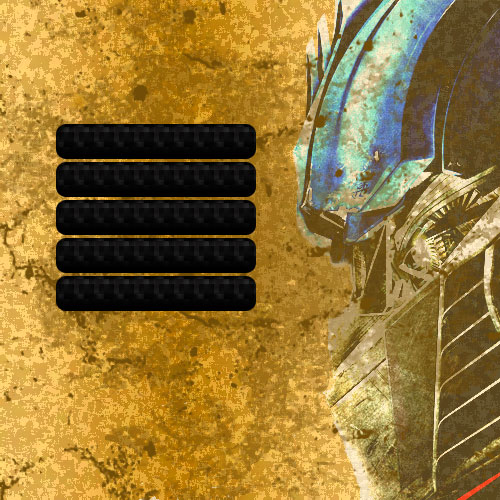
Step#5: Open a new layer (CTRL+N) and add an image. I used this one from the Movie Transformers to get this effect.
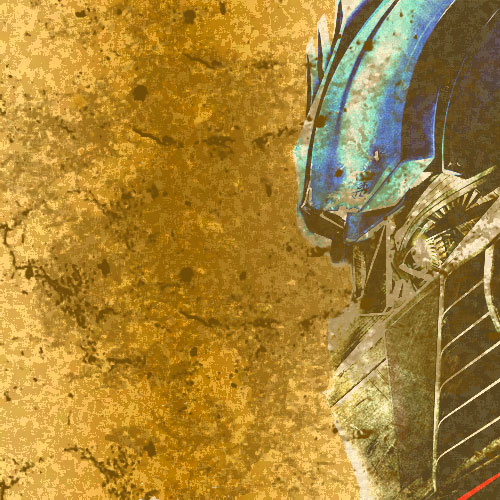
Step#6: Now we will use some Grunge Brushes on a new
layer. I have changed the foreground color to #714D07. I got this effect:
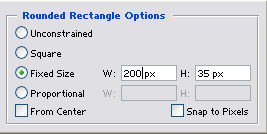
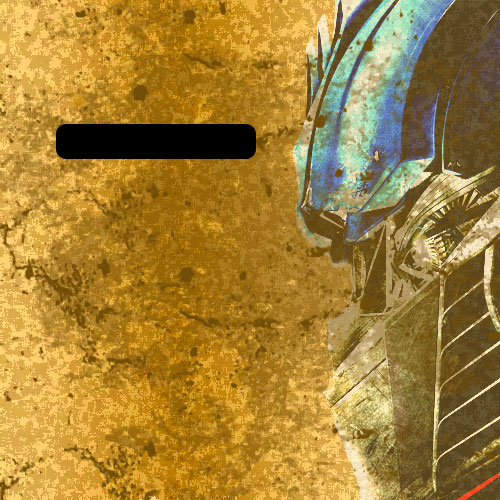
Step#7: Choose a new layer and change the foreground
color to #000000 (Black). Choose the Rounded Rectangle tool
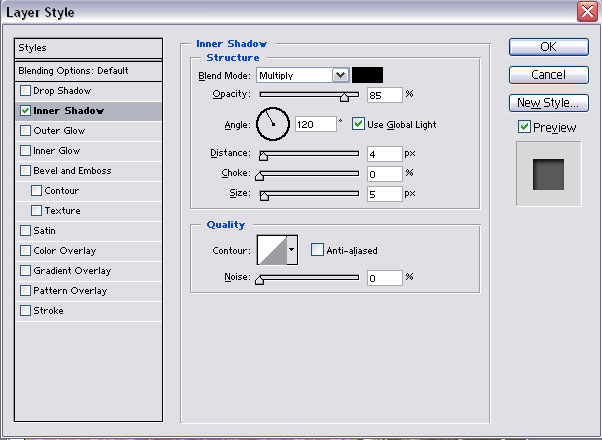
Step#8: Now let’s add some blending options to it.
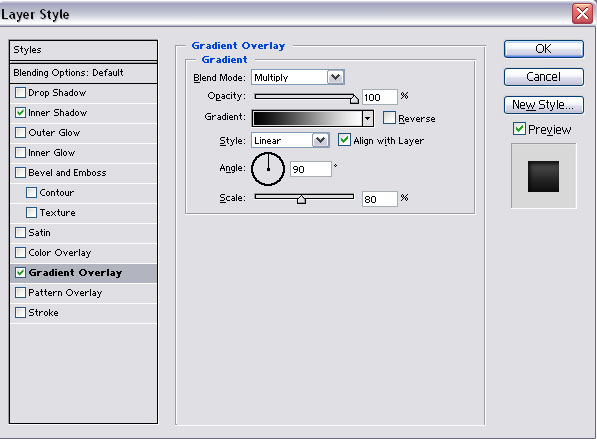
Go to Layer > Layer Style > Blending Options > Gradient Overlay
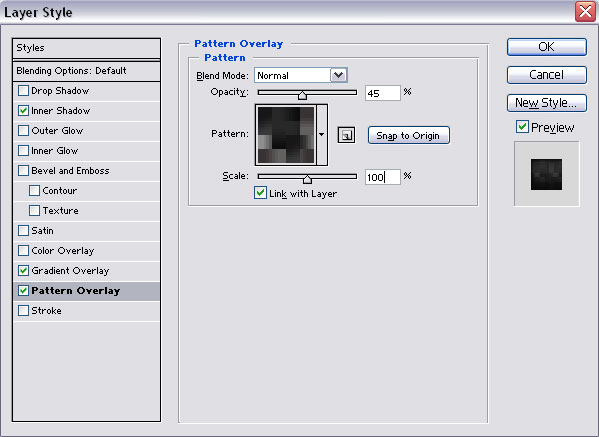
Go to Layer > Layer Style > Blending Options > Pattern Overlay
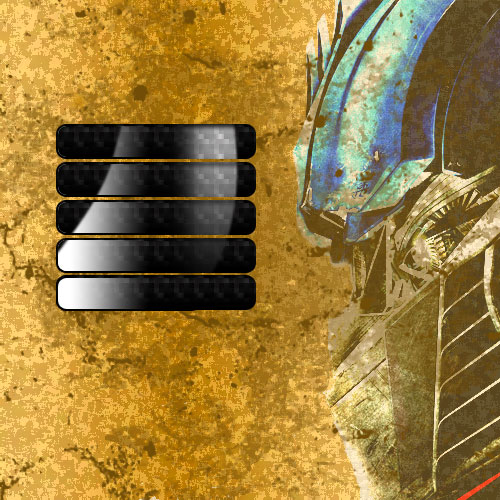
I have created the above pattern. If you want to use the same pattern then you can download the PSD file from here. Open the PSD file and Edit>Define Pattern. Save it as Carbon Fiber. Step#9: Duplicate each layer using CTRL+J. I copied the layer 4 times to get 5 links.
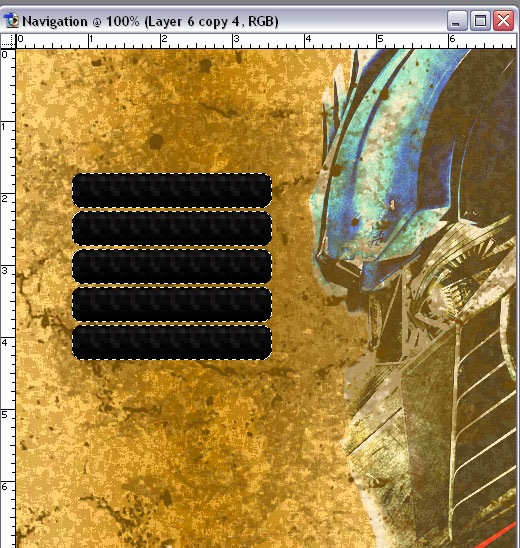
Step#10: Now we need to add a glossy shine to these navigational buttons. First hold CTRL and click on the first button to select it. Then press CTRL+SHIFT and click on all the other 4 buttons to select them as well.
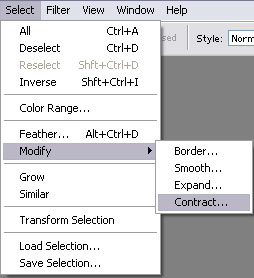
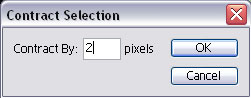
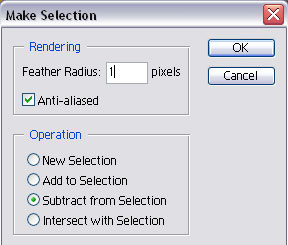
Step#11: Go to Select>Modify>Contract.
Step#12: Create a new layer. Change your foreground color to white. Click on Gradient tool and select Foreground to Transparent option.
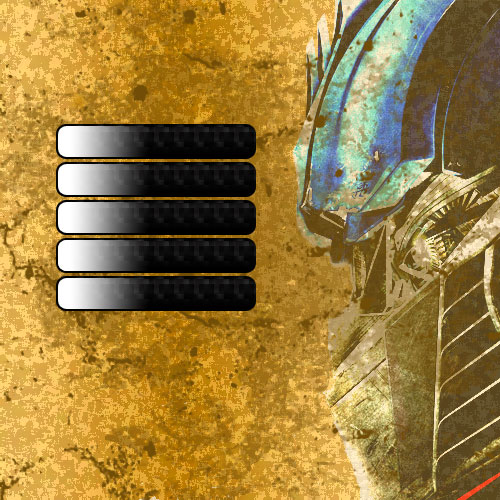
Now use the gradient from the left to the center of the button. Remember: All the buttons should be selected. It will be like this:
Step#13: Use the pen tool to draw any shape. Once you have drawn the shape, right click to make selection.
Step#14: Press Delete to give a different look to the buttons.
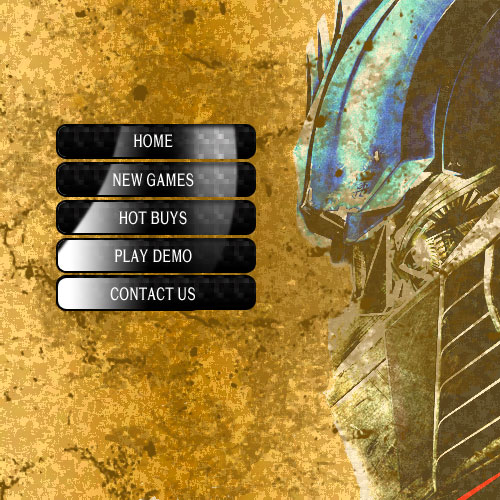
Step#15: Add text on each of the buttons using the Text Tool.
You can try different color combinations for the background
|