Web Design Graphics Tutorial#1: Using Photoshop to create Vista Style Website Buttons Step#1: Open a new document in Photoshop. Go to file>New or press CTRL+N.
Step#2: It will open a box where you can mention the width and height for your navigational menu. I have chosen 360 (width) x 360 (height) pixels at a resolution of 72 pixels/inch. Mode is RGB and background is transparent although you can choose white as well. Name of the file is Button-1. Step#3: It Now choose a new layer and change your
foreground color to #3e3d3d (light Gray) and background color to #151515
(Dark Gray). Choose the Gradient Tool
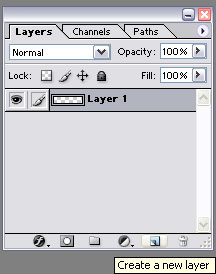
Step#4: Create another new layer
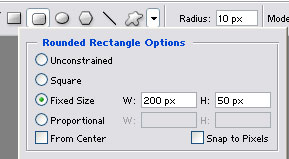
Use the Rounded Rectangle Tool
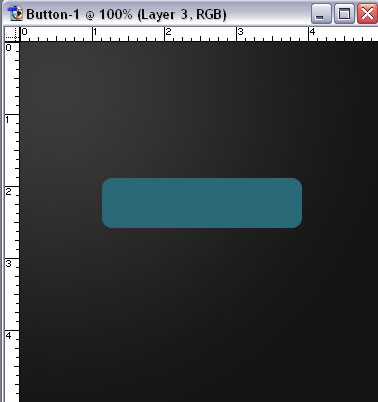
Step#5: Now change the foreground color to #1c3f47 and the background color to #2a6976. Now click at the center of the layer and the rectangle will form automatically.
Step#6: Choose the Gradient Tool
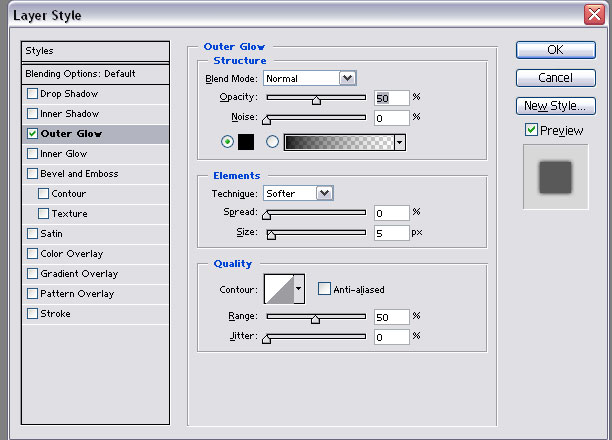
Step#7: To make it a Vista Style button, we will have to add some layer styles. Go to Layer>Layer Style>Outer Glow. Use the following parameters.
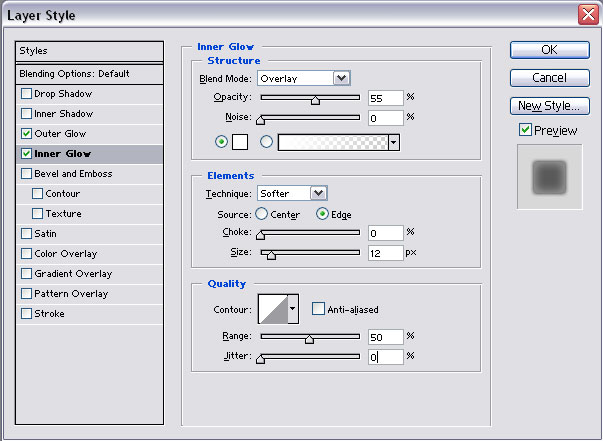
Now choose Layer>Layer Style>Inner Glow. Use the following parameters.
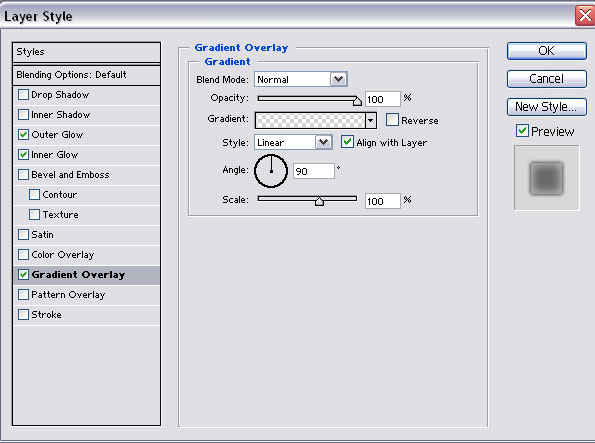
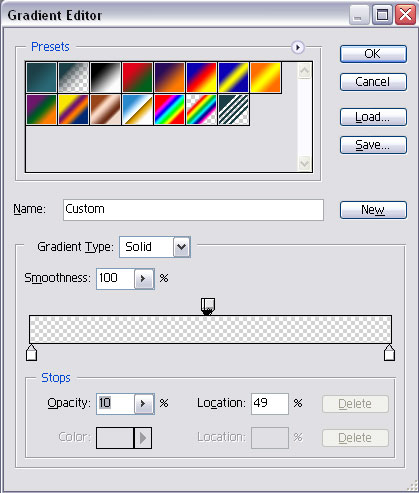
Now choose Layer>Layer Style>Gradient Overlay
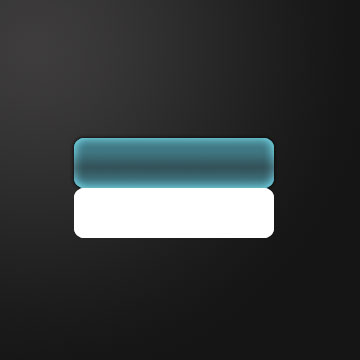
Now your button should look like this
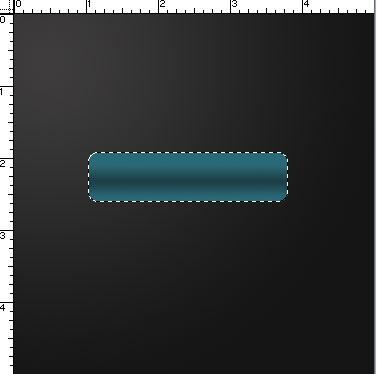
Step#8: Now to make it look more attractive, I have used a reflection. For this, first select a new layer and then select the rectangle by using CTRL + Click on the rectangular layer. Now fill your selection with #FFFFFF (White).
Now move the white layer below the previous (blue) layer using the
Move Tool
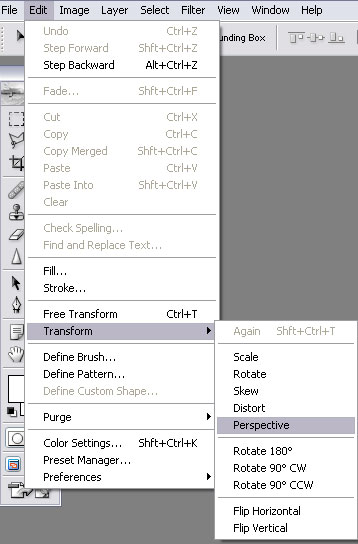
Step#9: Go to Edit >Transform > Perspective.
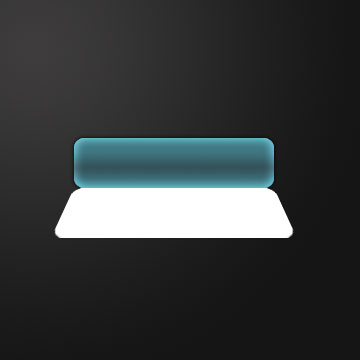
Drag the white rectangular box more towards your right while holding down the shift key.
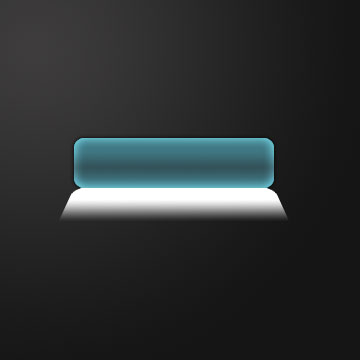
Step#10: Go to Layer >Add a Layer Mask. Then Use Linear Gradient with a Black and White combination. Black will be your foreground color and white will be your background color. Half of the white box will fade out.
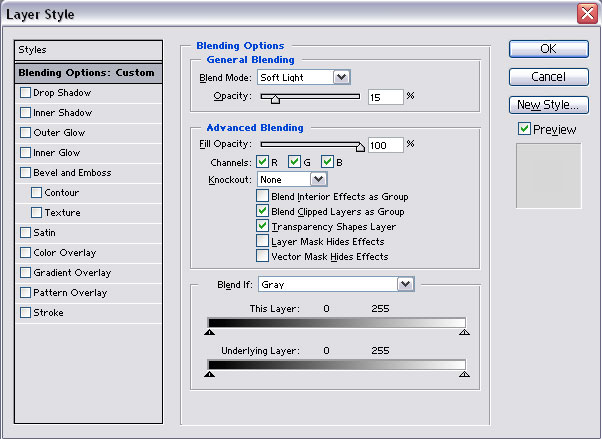
Step#11: Go to Layer>Layer Style>Blending Options. Blend Mode will be soft light and Opacity will be 15%
Step#12: All you need is some text. Use a nice font.
|